Showing posts with label Paint. Show all posts

Monday, November 21, 2011

7 Free and Easy Ways to Spruce Up Your Home Thanksgiving Guests - Day Four

Slap on a Coat of Paint!


Please pardon the skipping of days in this series... I have learned an important lesson.  Never try to do a 7-day series when you are getting your house ready to host a big Thanksgiving dinner.  It isn't wise.


Now that the confession is over with...


This day goes hand in hand with day 3 because it is just as easy to whip out my paint brush as it is for me to pull out the spray paint :)


I love when our home looks a little different every time people come over.  The truth is, most of the time people don't notice the little things, but I do and it makes me feel good!


There were 2 pieces of furniture that took maybe 2 hours total to change up. I only had the patience to take a before picture of one of them.  I think I have a problem... I LOVE TO PAINT FURNITURE!!


This was one of the first pieces of furniture that I inherited when I moved out of my college dorm room.  I'm not sure where it came from, but clearly no one wanted it anymore.  In an attempt to make it better (in my just out of college style) I stapled some fabric across the front and turned it around backwards.  It worked until I moved out of that house and my sister inherited it.  Well last week I inherited it back... fabric still in tact!


Not exactly the look I was going for in my living room though :)  So I took the fabric off, turned it around, and painted the stuffin's out of it.  If you are interested in how to paint the stuffin's out of your own furniture, go here.


Love Love Love

The other piece of furniture was a coffee table that I got awhile back for $10 at a yard sale.  I have this knack for putting things on hold and having 3 people ask about it before I buy it.  I spotted it in a garage sale that was about 10 minutes from being over on it's final day. I went to get the cash and there were 3 people there when I got back trying to deal with the lady so they could take it home - not happenin' folks.  This is my beauty!

I have seen a lot of beautiful pieces of furniture lately with painted bases and their original wood tops and I wanted one!


Overall the painting process is really easy.  Most people think it is a really arduous task to paint a piece of furniture, but I think most of the time it is just fear that you are going to mess up a perfectly good piece of furniture.  

All I can say is..... you never know until you try.  And, like Nester says, it doesn't have to be perfect to be beautiful.


-Katie


P.S. I'm not sure what's going on with the timing of my posts.  I titled them awhile back and apparently blogger thinks that I both wrote them and posted them when I named them.  Weird.

Saturday, November 12, 2011

Buh-Bye Orange MiniBar!

Remember back when I showed you my Gallery Wall?  I absolutely adore that gallery wall, but the back of this hallway was really bumming me out.  I hated it.  In fact, I gagged every time I walked in my door (okay that's a little bit of stretch, but I probably could have!)

Here is what the bar looked like when we first moved in.  Please be sure to notice the wine bottle border, chipping orange laminate countertop, and weird smell of mildew and old alcohol. Oh wait, you can't smell that... guess you'll have to take my word for it!


And after some pretty extensive (yet still completely FREE) work, I was able to turn it into something I am actually proud of!!


I started by painting the rest of the hallway the same color as my gallery wall. 


Then I got to work on the countertops.  While I had all the pictures to walk you through how I did it, Boog fed my SD card (with 1200+ pictures on it) to the dog.  So you can follow this tutorial... it's probably better than mine anyway if I am being honest with myself :o)


The counter turned out AWESOME.  I used lots of coats of Poly so it's really durable, but I was never brave enough to try it in my kitchen when we had laminate.  Creative Kristi said hers has held up perfectly though!


I knew I wanted a lamp on the bar, but I hated the stretch of cord that had to run across the countertop.  I made a no sew cord cover and I am currently working on about 4 more to cover some other ugly cords in the house :o)  It also covered up the ugly alarm system plug that is hanging out of the wall :o)

You can find a good tutorial for that here.


BEFORE


AFTER


No, I still haven't gotten around to painting my record cabinet.  I can't figure what to do about the fabric in front of the blasted speakers.  So here it sits in it's oak-y goodness.

BEFORE


AFTER


What was once a thorn in my side is now such a calm and peaceful space to walk into.   Too bad all it holds is all of my cleaning supplies :o) 

 I also want to note that this is still a temporary fix. When we begin homeschooling we are converting this area to a built-in desk.  HOPEFULLY similar to this one!


I know, I know... now all you care about is that picture.  Gorgeous huh?!  Maybe one day....


Katie

Linky Parties


Tuesday

Thursday, October 27, 2011

Simple Fabric Art

Empty frames?  Sure, everybody's got them laying around.  I'm not sure how they lose their insides, it just happens.  Perhaps everyone has a little procrastinator in them and never gets around to changing out those pictures.  

I have been working on completing my bathroom.  It has been an adventure.  This bathroom was the main reason we DIDN'T want to buy this house.  What am I supposed to do with yellow tile?  I'm slowly figuring it out :o)

I wanted some artwork that would help pull out the yellow and dark gray accent colors I had goin' on,  so I found some fabric scraps that I had and some empty frames and figured, why not?


I LOVE the way they turned out.  These are seriously simple to make.  Could not be ANY easier!

I started by spray painting my frames.  (There is no picture because I did it the day before the fever started. They sat in my yard for 3 days before I remembered they were out there :o)

Cut a piece of fabric about the same size as the inside of your frame.


Find a good surface that you can attach your fabric to, this one had a little lip in the inside that was perfect for this project.


 Find the center of one side of your fabric and staple it to the center of one side of the frame.  I used a staple gun (this one was $1 at a yard sale) to attach it, but I'm sure hot glue would work just as well!


Staple the center of the other side.


Attach the top and bottom the same way.


Staple along each of the sides pulling tight as you go.


Then staple along the top and the bottom, again, don't forget to pull tight!


Didn't they turn out cute?  It's a fun little way to pull out some accent colors in a room.  Now the yellow tile isn't as out of place.


As far as Boog is concerned, things are slowly improving.  This is the first morning in over a week that she woke up without a 103 degree fever! Things always get a little worse in the afternoons and evenings, perhaps one day she won't ask to sleep at the table while we eat dinner :o)


Thanks for those of you who are praying for us.  If you have left me a comment or emailed me, I'm sorry if I haven't responded.  I love that you are reading and showing the love, I just haven't sat down :o)

-Katie

Partying Here:


Thursday, October 20, 2011

Lamps, Lamps, and, oh yes, more Lamps

One thing you never, ever have to buy new.

A lamp is one of the easiest things in the world to change and very readily available now that brass has packed up and headed out of town.

If you missed my first two lamp posts, you can find them here and here.

The first lamp came from my grandmothers back porch.  It's a gorgeous lamp with a lot of detail.  The brass just didn't go with anything that I had goin' on, so I pulled out my sandpaper, clean metal primer, and Pewter Gray spray paint.  I refinished them the same exact way I did all my doorknobs.


For the shade, I used some spray adhesive to attach some drop cloth.  The colors blend perfectly together.  And the coolest part about this lamp?  It's got a little switch down at the bottom that you twist to turn it on!


This is also a pretty decent view of my next refinishing project. It's a working record player cabinet that is about to get the works!  When I switch picture angles, you can also see 3 more lamps that are in process :o)  I promise I'm not a strange lamp-lady! 


This one I found in my mom's closet.  I did it awhile back, but I wasn't sure how I felt about it so I didn't share it.  As it turns out, I love it... it just took a little while to grow on me.  (Can I say "it" any more in that sentence? I counted six...)


I sprayed the lamp with a color called "Bright Idea".  If you want to see a much cooler lamp in that color, go see Amy at A Little Piece of Heaven.  I think that's my favorite lamp...ever!

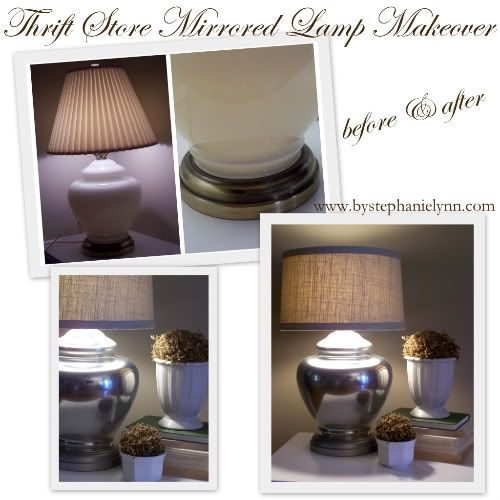
For the shade I used a Tutorial by Stephanie Lynn on how to make faux curled rosewood.  Her wreath is gorgeous and I was originally going to cover the entire shade, but I burned myself 1 too many times and decided to create a pattern.  I really heart it now.


I think of lamps as the icing on the cake.  It's a cheap way to stick your signature in a room.  It takes maybe 10 minutes to spray paint a lamp and I can't tell you how many conversations they start.  It's usually the first things people notice in a room.  Go to goodwill and find a $5 lamp with a fun shape and see what happens.  It's easier than you think :o)

My next attempt?


But I can't find that stinkin' paint anywhere!?  Any suggestions?

Have a great night!

Katie

Partying Here:
The Idea Room
The Shabby Nest
Tatertots and Jello
Be Different, Act Normal
One Artsy Mama
Under the Table and Dreaming
Craft-O-Maniac
Yesterday on Tuesday

Tuesday, October 18, 2011

When I Get Stressed I Paint...

Yes, as the title says, when I get stressed I paint.


If you missed my bedroom inspirations post, check it out.  The uneven stripe on the wall will eventually be covered by beautiful board and batten :o)

The lamp you can find here.


My future gallery wall (as in- I'm putting it together later today.)  Pardon that bathroom! I should've shut the door :o)


My bathroom is all one color now after a month of this.


So you get that I'm stressed.  

Big. Changes. Around. Here.

We decided that the pizza business isn't what's best for our family anymore.  Hubby the Great has decided to step out of the security of his job to make a better life for our family.  I respect his decision and am proud of him for being willing to move away from what he knows for the sake of us.

He has had 3 interviews with the same place and should find out in the next 48 hours if he got the job.  God is in control, always has been and always will be. 

Please pray for me in this move from security to insecurity, from the known to the unknown.  Please excuse a few possible slow weeks in the project realm of this blog because our financial situation is a little bleak at the moment.  

Thank you for reading this blog as it truly is an outlet for me right now, and you are helping me (and therefore my family) by offering support and encouragement in a big way! I love you all!

Off to paint some more!!

-Katie

Sunday, October 16, 2011

Claw Feet and Drop Cloth

I should NEVER go to yard sales without money.  Because every time I do, I run across something like this.  You can justify it and say that they are cheap, they would be beautiful, and I'll never find a deal like this on tables like these again.  At least that's what I did anyway.  I didn't need them, but I got them anyway just to see what I could do.


I wasn't sure about them until I saw these feet.  Aren't they gorgeous!?


The top had pretty extensive water damage, but I knew they would pull out somehow.


After digging on the top with a flat head screwdriver, I decided to investigate a little further and found that the tops unscrewed and came right out.  

I started by priming and painting.  If you are curious how I like to paint wood furniture you can find that here.

And then I glazed it.  You can find a tutorial on that here.


I painted the hardware using brushed bronze spray paint.  I use the same method that I used to spray paint my brass doorknobs here. Sorry about all the links to my own posts, but I get a lot of questions so I want you to be as informed as possible about I do it :)


I was at a loss for what to do with that insert.  I wanted to buy new wood and stain/paint it.  I also wanted to use upholstery webbing weaved through the top.  I had to use what was available, and all I had was drop cloth.  But I think it turned out pretty stinkin' fantastic.  I pulled it tight around the insert and stapled it underneath.  It was SO easy.  I love the contrast of textures.


I found a graphic from the graphics fairy and used freezer paper to transfer it onto the top.  It gives it a little more character.  I LOVE the way this top turned out!


And here is the final product.  I did refinish both of them the same way.  I'm just having some technical difficulties with the other one.  The piece on the drawer that slides along the track is broken and I can't put the top in until I get it fixed.  I just couldn't wait to show you!


 Those claw feet just pop now.  They are stunning.


BEFORE


AFTER


I know I said it before, but these are really going to be hard to let go of!

Let me know what you think!

Off to paint the bathroom :)

Partying Here:

Related Posts Plugin for WordPress, Blogger...